How to upload files from a Camera Phone to Zapa Client Portals

Bryan Stouffer
Publish Date:
December 3, 2020
Make Sharing thing here
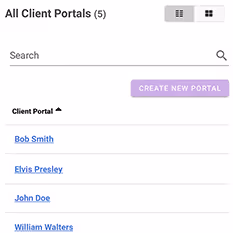
1. Open a Portal to upload a file to.
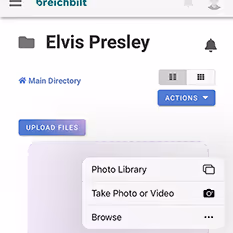
2. To upload a file, either tap the middle area or tap the "Actions" dropdown menu and select "Upload Files".

3. Choose "Photo Library" to select images from your camera roll, "Take Photo or Video" to upload from your camera, or "Browse" to upload from other apps and locations.
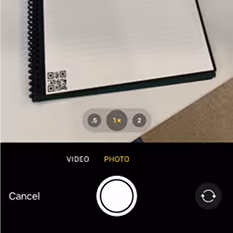
4. If you tap "Take Photo or Video", center the document in front of your camera and click the "Shutter Button" in the bottom center of the screen.
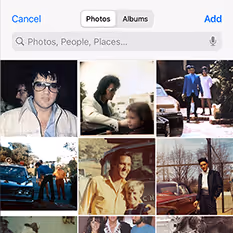
5. If you tap "Photo Library", select the image you want to upload and tap "Add".
6. The phone will have a natural naming convention for photos that may not be helpful for you, if that happens we can rename the file.

7. Tap the checkbox next to the new file, then tap "Actions" -> "Rename File".
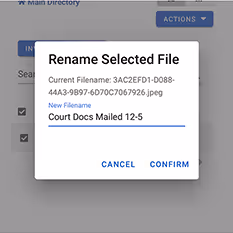
8. Type your desired filename (extension will be preserved) and tap "Confirm".

Copyright 2023 Breichbilt LLC